
Do you love that old time rock and roll? How about in your stamping? Learn how by watching this video!
Wednesday, February 27, 2013
Saturday, February 23, 2013
Studio J Saturday: Express Collections
Would you like to make a complete layout in five minutes? That's how long this one took me to make using an Express Collection - so easy, and great results!


$5 Studio J layouts until March 15! Try Studio J today!


$5 Studio J layouts until March 15! Try Studio J today!
Wednesday, February 20, 2013
Art Attack: Framing Your Sweet Treats
This Clearly the Best video features one of my favorite stamp sets!
Saturday, February 16, 2013
Studio J Saturday - Avonlea
For a few years, I have been working on a project to scan all the photos from my husband's childhood. The photos were in magnetic albums (aaarrrrggghhhh!), so I rescued them. As I started scanning the photos to share with the rest of his siblings, I decided to make Studio J layouts and order four copies of each layout. It has been quite a process, but I'm happy to say I have finished! I'm going to be sharing the layouts on Saturdays for quite some time (there are LOTS of layouts!). I especially love this layout of my husband, his brothers, and their sister when they were little. (My husband is one of the twins.) They were stairsteps - four children born in three years! They were so cute, and the Avonlea papers complement the older photos so well.


Remember that Studio J layouts are only $5 each (for a 2-page layout) until March 15. You can try the software here for free! Design as many pages as you'd like - you only pay when you purchase the layout.
Thursday, February 14, 2013
Happy Valentine's Day!
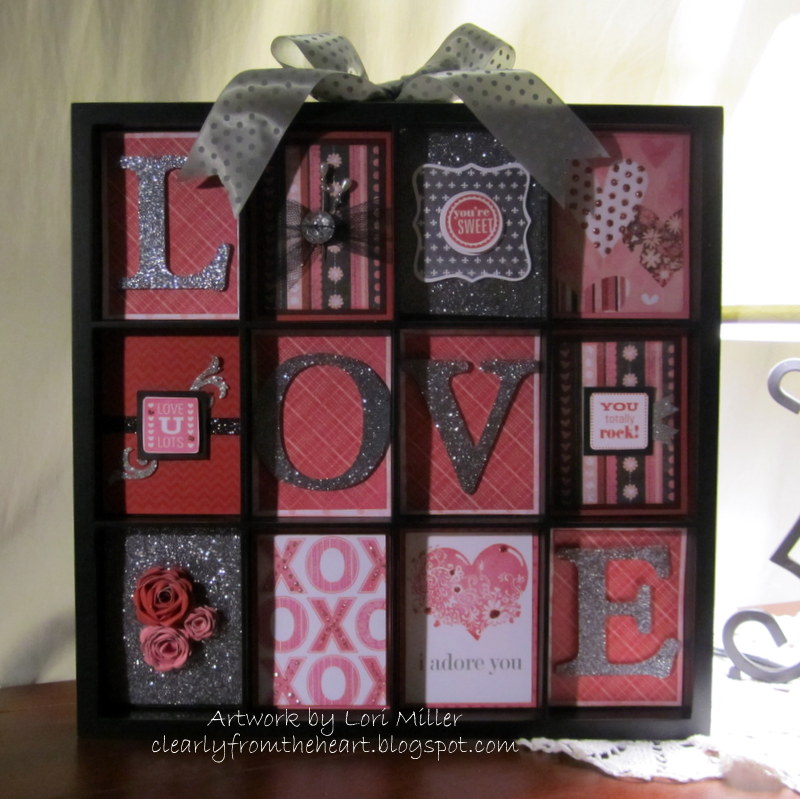
Thanks for counting down with me! Here is my grand finale - the display tray. I apologize for the quality (or lack thereof!) of the picture. It's late, and the lighting is not great.

I used a variety of papers and stamp sets. I tried to add a little bling to every section. My secret with this board? I fastened each section in using our little hook and loop circles! I will be able to switch out the sections each season. Happy Valentine's Day!
I used a variety of papers and stamp sets. I tried to add a little bling to every section. My secret with this board? I fastened each section in using our little hook and loop circles! I will be able to switch out the sections each season. Happy Valentine's Day!
Wednesday, February 13, 2013
Art Attack: Cluster Stamping
If you admire the artwork in the CTMH Idea Book, you will love to see some of the tips about how they make it look so great!
Tuesday, February 12, 2013
Countdown to Valentine's Day - Day 12: Chalkboard Technique
This one is getting in just under the wire! We're almost there - thanks for counting down to Valentine's Day with me! Today's project is not only my countdown project, but it also works for two challenges - Mojo Monday and the Heart 2 Heart Challenges Love Is in the Air challenge.

I tried the trendy chalkboard technique. I used the CTMH Chalkboard paper (12 x 12) and White Daisy pigment ink to stamp the sentiments. I used the heat gun to set the ink a little, but I also wanted some smudges to look like erased chalk. (That's my story, at least - and I'm sticking to it!) I will definitely be trying this technique often.

Sunday, February 10, 2013
Countdown to Valentine's Day - Day 11 - Mailbox

One of the things I love the most about the Artiste Cricut cartridge is the option to make so many 3-D items like this mailbox. It was SO easy to make. The pieces are sized so they work together based on the size you select; you don't have to figure out how big to make the flag, for example. I selected the mailbox at 3"; the flag and tab were sized accordingly. Super easy! I cut out two mailboxes then cut out the front on the second mailbox for a contrasting paper on the front of the mailbox.
Who wouldn't want to receive this filled with sweet treats!

Items Used:
- Cricut Artiste Collection
- Paper: La Belle Vie (retired)
Countdown to Valentine's Day - Day 10: I Mustache You . . .

I "Mustache" You - Will You Be Mine? Corny - yes! But I think it's fun, too. I'm not sure where the mustache trend started, but I'm glad CTMH got on board! The 'staches on this card were cut using Cricut Artiste. This was a fast, simple card to make.

Update: I submitted this card for the Heart 2 Heart Challenge "We Mustache You to Join!" in March 2013!
Items used:
- Cricut Artiste Collection
- Cardstock: White Daisy, Black, and Cranberry
- Stamp sets: Whooo's Your Valentine; Trinity Alphabet
Saturday, February 9, 2013
Studio J Saturday: Express Layout - All About Me

Studio J is continuously improving and offering more features. One of the newer features is the Express Collection. Express Collections are exactly what they sound like: a quick, pre-made layout. All you do is drop in the pictures, add journaling, and change the title if you wish. You may also add some embellishments and change the paper colors if desired, but the layouts are lovely just like they are. The only thing I changed on this Express Layout (from the All About Me collection) is to add a small text box and bow above the title "Friends." Super fast, easy, and gorgeous!
The lovely ladies in the photos went to Detroit with me last fall for a 2-day CTMH Regional event for consultants. We enjoyed two fun days of laughing, eating, and creating!
If you think you'd like to try Studio J, the Express Collections are a great way to go. Give it a try today and enjoy results like these!


Friday, February 8, 2013
Digital Delights! $5 Studio J Layouts in February!

February is sure to be a month of digital delights because you can purchase any Studio J® layout for only $5*—that’s a savings of $1.95 per layout! This is a great opportunity to try Studio J for the first time. Create adorable baby layouts with the Wishes and Fishes kit (shown), or use the new Express Collections with collections of 10 ready-made layouts plus a front and back cover that are easy to use and professionally designed. Preserve your memories at a low price for a truly digital delight!
You can access Studio J {here}.
*Shipping/handling applies. Studio J credits must be redeemed before this promotion can be applied.
Offer valid February 1–28, 2013.
Thursday, February 7, 2013
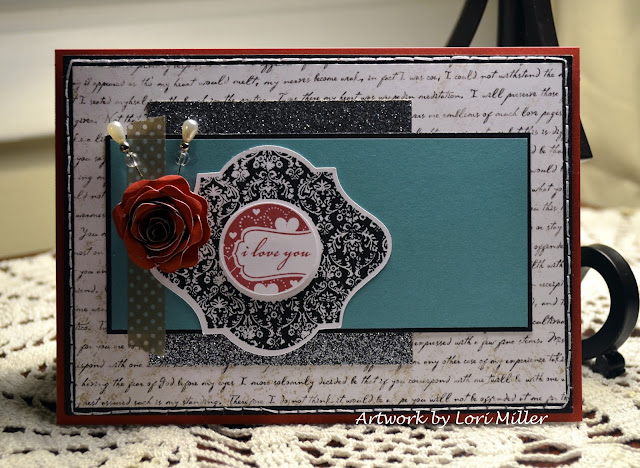
Countdown to Valentine's Day - Day 8: A Little Valentine Mojo
I took advantage of this week's fun Mojo Monday sketch to create the card for today's countdown. I used some brand-new products, like the washi tape - LOVE!
Items used (all Close To My Heart):


Items used (all Close To My Heart):
- For Always paper packet
- Black & Grey Glitter Paper
- Perfect Fit - Frames stamp set
- Salutation Seals stamp set
- Slate Polka-Dot Washi Tape
- Art Philosophy Cricut Collection
- Artiste Cricut Collection
- Bling assortment (retired)
- White embroidery floss
- 3-D Foam Tape
- Ruler
Wednesday, February 6, 2013
Countdown to Valentine's Day - Day 7: Muslin Drawstring Bag
How's this for a little bag of sweetness? It is filled with kisses (Hershey's).

I whipped up this project in no time thanks to our brand-new My Creations Muslin Drawstring Bags. They come in a set of 3 bags (4" x 6") for $3.95 and take ink really well. I used Hollyhock and Cranberry pigment inks which work great on fabric! Be sure to slip a piece of cardstock inside the bag before stamping to prevent bleed-through. The stamp set is retired but is one of my favorites. After the ink dried a little, I blinged it up with some Bitty Sparkles. What's Valentine's Day without a little bling?
Remember to add your Valentine's Day party to the link below!
If you'd like some more tips and ideas on using the muslin bags, enjoy the video below:
Art Attack: Basic Stamping Techniques
Are you new to stamping? Maybe you're a seasoned veteran but would like a refresher. This Clearly the Best video shows you the basics of stamping techniques.
Tuesday, February 5, 2013
Countdown to Valentine's Day - Day Six: Treat Tube
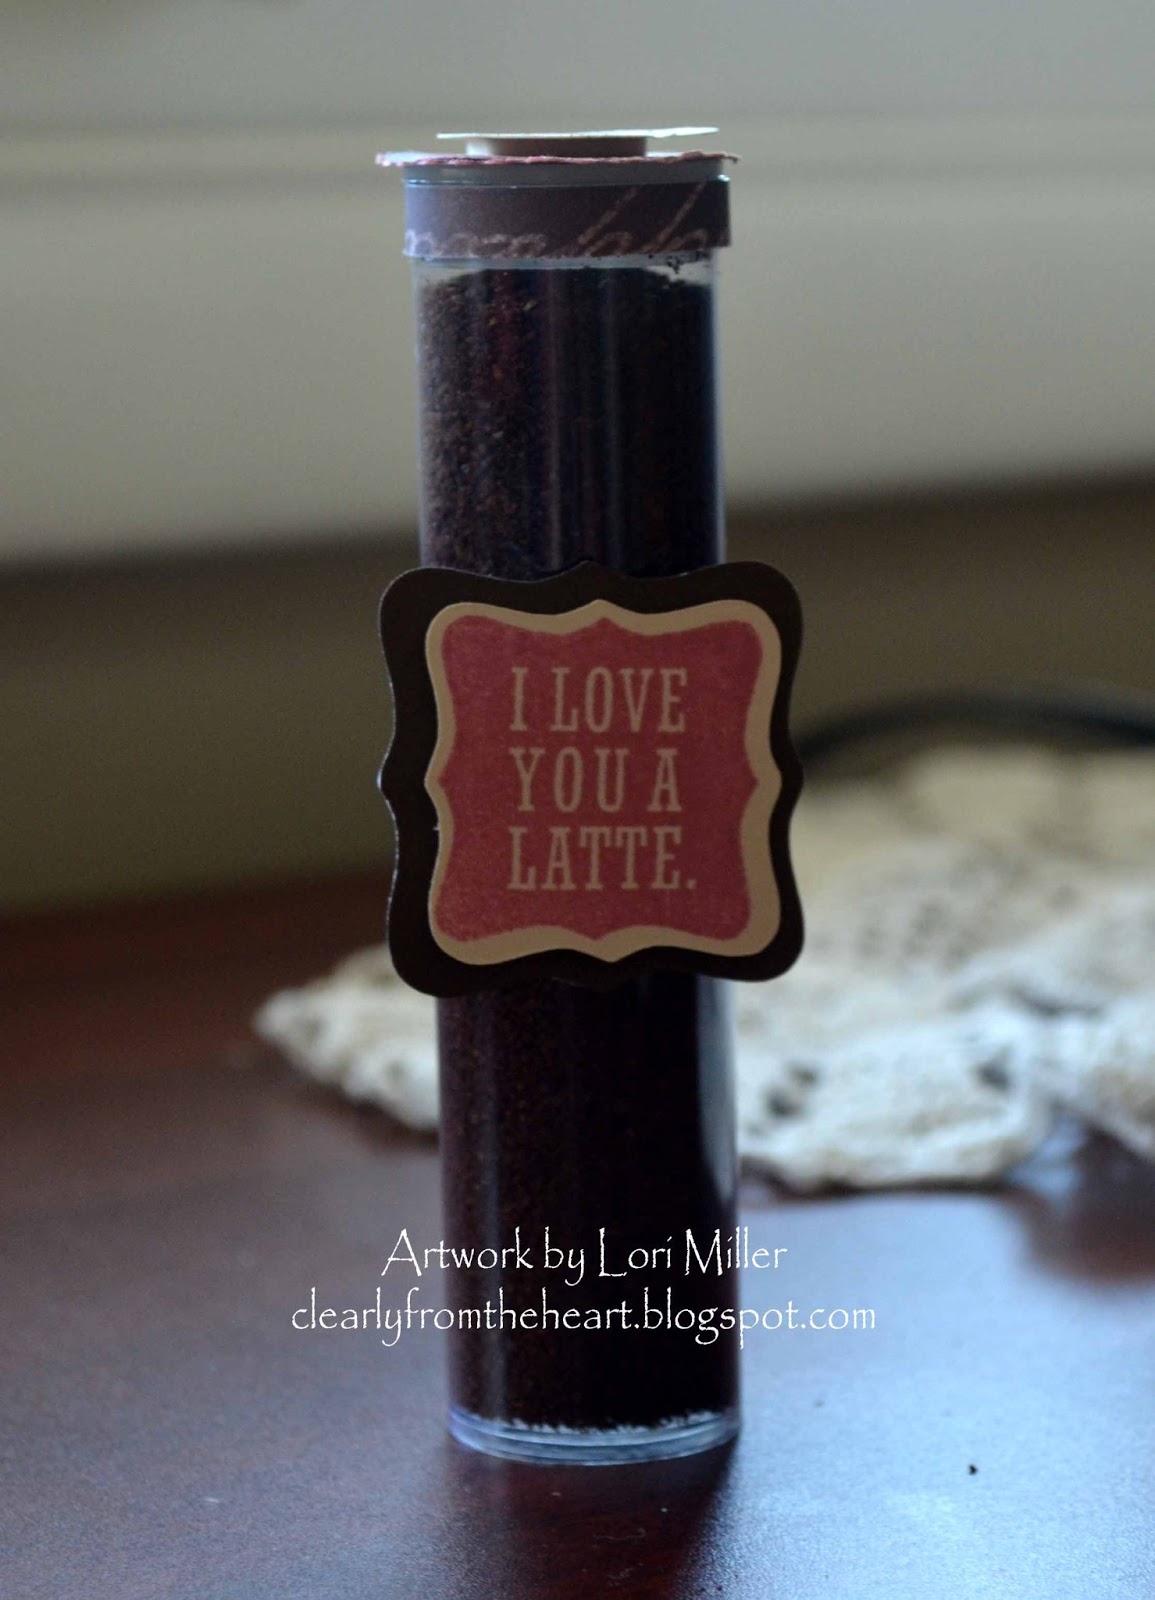
Another fast project - this one using our new Treat Tubes (available soon) and the Cup of Cheer stamp set. I created a band around the tube (and should have photographed it better) using the coffee beans stamp. The tube is filled with coffee for a little gift.


Monday, February 4, 2013
Countdown to Valentine's Day - Day Five: Heart Card

Welcome to Day Five of the Valentine's Day Countdown! I'm really loving the combination of kraft cardstock and Smoothie ink and cardstock. This sweet little card was inspired by a Pinterest creation found here. (What did we do before Pinterest?) I also got my money's worth out of the Whooo's Your Valentine stamp set. I love all the hearts!
Sunday, February 3, 2013
Countdown to Valentine's Day - Day Four: Card Box

I'm crazy about the Love notes! I covered a My Creations Card Box with Smoothie cardstock. The top was decorated with the Love stamp matted with a Smoothie heart cut on Artiste. A little bling was added using Silver Shimmer Trim, Sparkles Clear Flourishes - Small, Pixie Glitter Alphabet, and a Shimmer brad (retired). So easy!
The cards came together really quickly. I used the Love stamp on a White Daisy square matted with Smoothie. The cards fold on top, so I wrapped the card with Slate Satin Polka Dot Ribbon, which I gathered on the side with a piece of Smoothie Baker's Twine. It took a bit of creative placement to get all four cards to fit neatly in the box, but they do fit! I hope you enjoy this project and add yours to the countdown!


Saturday, February 2, 2013
Countdown to Valentine's Day - Day Three: Checkerboard Heart Card

This card just makes me happy. It was so fun to make! I was inspired by this card I found on Pinterest. I started with a 6 x 6 inch kraft card base then added a 5 3/4" Cranberry mat. The main part of the card is a 5 1/2" square of kraft cardstock. I made a grid using 1/2" inch strips spaced evenly. The hearts (Whooo's Your Valentine) are all stamped on kraft cardstock then hand cut. I placed the smaller hearts directly on the background; the larger heart are raised using 3-D foam tape. The smallest heart is layered on top of the large heart then topped with a knot of hemp baker's twine from the new Mini-Medleys Accents Wooden Collection. Everything is distressed with Saddle ink.
Here's the inside:

Studio J Saturday: Express Collection One More Time

Here is another quick layout from the All About Me Express Collection. One fun thing I did was to make a subway-style journaling box. I created multiple text boxes, using different fonts and turning the boxes different ways. I thought it was a fun touch to reflect the fun we had on our CTMH getaway!
I also created a journaling text box, changed the background to "none," then layered the box over the main photo. I love the effect!


Friday, February 1, 2013
Countdown to Valentine's Day - Day Two

Wouldn't you love to receive this cute little milk carton filled with sweet treats? The milk cartons come in a set of two and are plain so you can decorate them just as you'd like. (They also come flat for easy stamping.)

Be sure to add your creations to the collection!
Subscribe to:
Posts (Atom)

